Showing posts with label sewing. Show all posts

Wednesday, February 13, 2013

Geometric Blanket


This is a blanket I made for my sweet niece, Grace.  She had been asking me for months to make her a blanket.  I figured her birthday was the perfect occasion.  This was the blanket I was working on when Ella decided to make her own
I topstitched all of the triangles in place. They are all a soft jersey material so they shouldn't fray.  The back is a soft jersey also.  I used another stretchy jersey for my binding.  I really like how soft and cozy it turned out.  I need to make more time to sew.

It's been really hard for me to keep up the last couple of weeks.  
I think I was spoiled a little when the kids were sick and we had a couple of slow lazy days.  
I have a growing list of house projects that I want to start on and get done, 
but my first project is to get my raised planter beds built. 
I am so excited to have a garden again.  

Thursday, February 7, 2013

She sews! - Easy kid's sewing project


Last week I was working on a blanket for my niece for her birthday.  As usual I was running a little behind on time.  Ella was watching and trying to help me here and there.  Usually I encourage her to help but with my time constraint, I let her know that I needed to do most of the work.   She was a little disappointed, until she decided to make her own blanket.  I know she knows how to use the machine properly, but she had never made anything completely on her own.  She collected my scraps and she told me she was going to make a little blanket for her puppy.  I told her I didn't have time to help her, but if she wanted to do it all on her own she could go right ahead.  

Guess what?  She did!!

I had to at least stop and take a picture of her at the machine because it just makes me so excited to see that she has an interest in sewing.  Sigh!

She did ask me what step to do next as she was making it and she followed directions perfectly.  

It was a simple blanket, but she did it all on her own!!

This is how she made it, if you want a simple starter project for kids...or yourself.  It's never too late to learn something new.

1.  Cut two pieces of fabric to the same size.  (Ella just used my leftover piece so it ended up being a long rectangle.  You can cut to any shape. ) 

2.  Pin fabric together with right sides facing each other.

3.  Sew with a 5/8 inch seam allowance almost all the way around leaving a 3 inch opening.

4.  Turn blanket right side out.  Ella had a little bit of a hard time turning it but managed.

5.  Sew opening shut as close to edge as possible with a topstitch.

6.  Topstitch all the way around blanket about 1/2 inch from the edge just to make it a little cleaner and so it will stay a little nicer.

Tuesday, January 22, 2013

DIY - plain sweatshirt makeover

 I bought a cheap plain black sweatshirt for Julian 
for his Halloween costume in case it got cold.   It was worn for about an hour.

 It hasn't been touched since, so I wanted to change it up a little.  
It is more Ella's size so I decided to make it over for her.

This is what I did.

That's it.  
Super simple.  
I'm not in love with how the collar turned out, but it will do for now.  
I only sewed the top and tacked the tip of the collar down so it would be pretty easy to change out. 
I wanted more of a peter pan collar.
It looks a little Amish to me, but she didn't seem to mind.

I have an itch to sew right now.

Thursday, October 25, 2012

the BIRDS


 halloween is right around the corner and i'm actually ahead of the game this year with costumes.  
they aren't quite done, but we are getting close. 
 i was pushed a little this year with two dress up costume parties at the beginning of october.  
just what a procrastinator needs.  

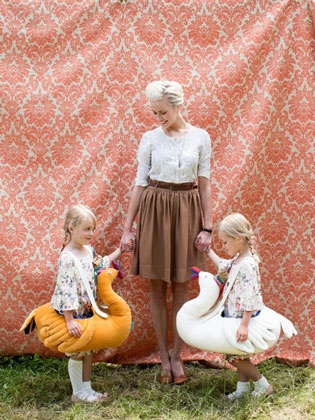
we are all going to be different birds this year.  
Julian is going to be a crow and Ella is going to be a hawk.
i really wanted her to be a swan but there was no way i was going to convince her of that.

'mom, that's not scary!'
hawk it is then.

i'm making masks for Andy and I also.  
Andy's is going to be a crow and I'm not sure what type of bird I'm going to be yet


now I just need to get my machine working again 
so I can finish the rest of their costumes.

Wednesday, June 13, 2012

summer sewing inspiration

sources 1, 2, 3, 4, 5, 6,

i have the sewing bug right now and i have learned that i need to sew when i feel like it because i might not feel like it tomorrow.  that is exactly what i did yesterday. 

 ella is in need of new shorts and i was inspired by the last pic so even though dinner needed to be started i sat down for a few minutes and cut out the fabric.  i finished them up last night when we got home and i love them.  i will share them after i get a picture of them.  
when ella saw the fabric i picked yesterday she said she didn't like it.  
i was bummed but i knew they were going to be cute.  this morning she was up and dressed before i even woke up and guess what she had on...yup, she had her new shorts on!!! 
she said she loved them.

just what i needed to get motivated to sew a little more.

Friday, May 11, 2012

DIY: rug bag


today i am super honored to be doing a little guest post over on Mandi's blog Make it Dear.

i am sharing a little tutorial on this rug bag.
a while back i bought a bunch of Ikea rugs after i saw a picture on craftgawkers of small area rugs sewn together to make a large area rug.  clever right?  well i bought 6 and only ended up only hand sewing 3 together.  a couple of weeks ago i made a bag out of one for a friend's birthday.  i loved the fringe end and couldn't help make one for myself.

go check it out and browse around Mandi's blog.

have a great Friday!!


Tuesday, April 24, 2012

random


lately i...

*  have had sewing had been on my mind.  i made a pair of pants for myself...ha, ha, they will be 'around the house pants'.  i was inspired by these and mine turned out just a little too tight at the hips, think very 70's when you imagine them.  i will try another round at them.  i made the dress above for the little miss and she loved it.  it's super lightweight and perfect for a warm sunny day.

*  finally joined in on the pinning and can we just say amazing...i have no idea why it took me so long to join in.  no more trying to bookmark and remember where things are...i love it!!

*  started doing a workout video my mom loaned me.  yes, my mom.  she is the workout queen.  i remember when i was little she was always doing her jane fonda workout videos...ha, ha, any one remember those?  this video is kicking my booty. i have been so sore and i have realized that i am not coordinated at all.  i'm sure i would be pretty entertaining to watch... julian finds it pretty funny.

*  have been knee deep in dirt helping my mom do a little change up with their landscaping...i really love planting new plants. in a weird way it is relaxing for me.

*  have been making a lot of different smoothies...banana, peanut butter, TJ's vanana yogurt, and flax seed is my current favorite.

* planning out a little change up in our backyard

*have found some inspiration here...sewing, photography, kid activities, blogging and projects

have a happy tuesday!!

Tuesday, April 17, 2012

sweater makeover

now that it is getting hot i finally got around to doing a little makeover on a sweater i got a while back at an estate sale. 

 i loved the knitted pattern of this sweater.
 i knew i wouldn't wear it but i bought it anyway.  
initially i had plans to make a little bag or or pillow cover, but then i decided to try to make a mini version for ella.
 i took some pictures of her in it before i added the velvet ribbon to the other side.  
it just didn't look finished with it only on one side.

here is how i made it
i used one of ella's sweaters as a size guide. 
i used my serger on the bottom of the sweater and sewed the trim on.
for the trim along the opening i just hand stitched a velvet ribbon on it.
this was the perfect cover up for a couple of little stains.
it's ella approved!!

Thursday, April 5, 2012

DIY : simple plushie pup

 so i'm going to go ahead a apologize upfront for the horribly boring pics.  i often sew at night after the kiddos are in bed and the lighting is beyond bad so guess what?...that's when i also took these pics.
i almost forgot to even take a picture when it was completed and all tucked into the cozy blanket, but I remembered after the kids were already strapped in the car and we were heading out to deliver the little guy.
so here we go...
 i just found some fabric from the local shop called 'MK's fabric stash/store'.  
(not to be confused with my favorite fabric store M & L)
 yes, i kind of hoard fabric...it's a sickness that comes in very handy for projects like this.
 i usually use a flannel and a soft fleece but i only had the polk-a-dot flannel and the cotton houndstooth...it worked.
the piece of houndstooth was the last bit i had so that is how i got the shape of my dog.  
i just freehanded the silhouette but a stencil could probably be found pretty easily.

i have found that it's easiest to draw exactly where i am going to sew rather than drawing at the seam allowance.
 i'm obviously not super strict about staying on the line since it is hand drawn after all.
make sure to use a short stitch length...i had mine set at 2.
leave a 2 inch opening for turning and stuffing. i usually try to leave the opening at a straight part (not a curve or corner...it's just easier to sew closed when it's straight) in whatever i am sewing and on a part that is not obvious.
i left the opening on the pup's belly for this one.
 sounds backwards to cut out leaving a seam allowance since you already sewed it, 
but just trust me you still have to have that in there.
make sure to cut the notch out of the curves that curve out and a line at a curve that curves in...confused?
look at the picture...i tried to draw them in a little better.
it makes it easier to turn and there won't be any puckering.
careful not to cut through your seam...but if you do, no worries, just throw it away and start all over again, ha...joking, just sew over the seam again where you cut through.

 this is kind of a pain and will probably make you curse...especially if your animal is small. 
 the tail on this guy was the worst.
i used a capped pen to help push it through, but anything with a blunt tip will work.
don't use the point of a knitting needle it will probably poke through (trust me)...then you will really curse.
 ok stop... your not done yet!
 use small pieces it usually feels a little less lumpy when you are done.
  i think this is kind of a slip stitch or a blind stitch.  not sure if this helps or makes it more confusing, but i start inside under the seam allowance and poke up right where the two pieces should come together...right inside the fold.
go straight across to other fabric and poke right into the top of where the fold would be.
pull though and poke back up in same fabric about 1/8th of an inch away and keep going...
make sense?...good.  i'm actually a sewing instructor and use correct terms all the time, ha, ha.
i have actually never taken a sewing class before (unless you count a jr high sewing class, ha, ha)
just wing it...the point is to just close that gap so the stuffing does come out, right?
top stitch on the machine if you have to, just close it!
 i hand stitched the ears on just using a running stitch where the stitch is visible...
hey it's going to look so good you want that baby to realize that it's actually hand made, ha.
hand stitch the button eyes on.  
i have found it easier to add these on after sewing the two pieces together. 
 i sew the two eyes on at the same time. 
it looks kind of cute with the tufted look at the eyes.
tuck your card in there and throw a string around it.
easy? let me know...

Wednesday, April 4, 2012

a squishy pup


a cute new pup for a new baby
i did a little sewing this past weekend for two new babies.
just to make it easy on myself they pretty much got the same thing, a squishy pup and a soft little blanket.

this type of animal is so easy to make, i took pictures of the steps on the second one i made and will post a tutorial soon.

Tuesday, March 13, 2012

DIY: old tie into 2 new bows


bows are fairly simple to make but I like to cut corners and save time any chance I get...who doesn't right?

well here is a way to repurpose an old tie and make two new bows with very minimal sewing.  
I suppose you could do it a no sew way with just fabric glue but I have a hard time waiting for glue to dry.
here we go...
1. get yourself an old tie 
2. cut about an 8-9 inch section that is about the same width.  
(Some of those old 70's ties really get fat and it is hard to find a part that is the same width)
most ties have an extra piece in the middle to help the tie keep it's form- pull that piece out.
3. fold the piece in half with seam side on the outside, or right sides together and sew.
4. flip right side out
5. cut a small piece of fabric about 2 inches by 2 inches and sew along one edge right sides together. inside out...this is going to be the piece that goes around the center of your bow.
6. wrap piece around the center of the bow and pull as tightly as you can and sew. (TIP- I usually move the needle position towards the outside to sew closer to the bow)  
you can try to flip that piece so that the seam is on the inside but it's a real pain and I it won't even show when it is worn.
7. ella likes to wear headbands lately 
so I just slide the bows on and off and that way she can change them whenever she wants and she only needs a couple of different actual headbands.
these can also be attached to clips or pretty much anything with fabric glue.

here is the second style of bow you can make with that same old tie...
it is made pretty much the same way except using the skinny side of the tie. I also used a much longer piece to make a long skinny bow.  
this bow was made with a pice about 16 inches long.
there you go...
pretty easy, right?

Monday, March 5, 2012

sewn shorts

 as the weather has been getting hotter, I have been going through the kid's clothes and noticed that both of them have really sprouted.  
I haven't sewn too much lately but I have really been wanted to set aside a little time to sew the kiddos some new clothes.  
I decided to start out pretty easy and make some shorts for Ella.
I blocked out a pair that still fits her and customized it a little.
 as soon as I had her try them on 
she said they would be perfect for practicing somersaults...

I think she was right.
they were also great for jumping off things and meeting new little friends.