Showing posts with label toys. Show all posts

Thursday, April 5, 2012

DIY : simple plushie pup

 so i'm going to go ahead a apologize upfront for the horribly boring pics.  i often sew at night after the kiddos are in bed and the lighting is beyond bad so guess what?...that's when i also took these pics.
i almost forgot to even take a picture when it was completed and all tucked into the cozy blanket, but I remembered after the kids were already strapped in the car and we were heading out to deliver the little guy.
so here we go...
 i just found some fabric from the local shop called 'MK's fabric stash/store'.  
(not to be confused with my favorite fabric store M & L)
 yes, i kind of hoard fabric...it's a sickness that comes in very handy for projects like this.
 i usually use a flannel and a soft fleece but i only had the polk-a-dot flannel and the cotton houndstooth...it worked.
the piece of houndstooth was the last bit i had so that is how i got the shape of my dog.  
i just freehanded the silhouette but a stencil could probably be found pretty easily.

i have found that it's easiest to draw exactly where i am going to sew rather than drawing at the seam allowance.
 i'm obviously not super strict about staying on the line since it is hand drawn after all.
make sure to use a short stitch length...i had mine set at 2.
leave a 2 inch opening for turning and stuffing. i usually try to leave the opening at a straight part (not a curve or corner...it's just easier to sew closed when it's straight) in whatever i am sewing and on a part that is not obvious.
i left the opening on the pup's belly for this one.
 sounds backwards to cut out leaving a seam allowance since you already sewed it, 
but just trust me you still have to have that in there.
make sure to cut the notch out of the curves that curve out and a line at a curve that curves in...confused?
look at the picture...i tried to draw them in a little better.
it makes it easier to turn and there won't be any puckering.
careful not to cut through your seam...but if you do, no worries, just throw it away and start all over again, ha...joking, just sew over the seam again where you cut through.

 this is kind of a pain and will probably make you curse...especially if your animal is small. 
 the tail on this guy was the worst.
i used a capped pen to help push it through, but anything with a blunt tip will work.
don't use the point of a knitting needle it will probably poke through (trust me)...then you will really curse.
 ok stop... your not done yet!
 use small pieces it usually feels a little less lumpy when you are done.
  i think this is kind of a slip stitch or a blind stitch.  not sure if this helps or makes it more confusing, but i start inside under the seam allowance and poke up right where the two pieces should come together...right inside the fold.
go straight across to other fabric and poke right into the top of where the fold would be.
pull though and poke back up in same fabric about 1/8th of an inch away and keep going...
make sense?...good.  i'm actually a sewing instructor and use correct terms all the time, ha, ha.
i have actually never taken a sewing class before (unless you count a jr high sewing class, ha, ha)
just wing it...the point is to just close that gap so the stuffing does come out, right?
top stitch on the machine if you have to, just close it!
 i hand stitched the ears on just using a running stitch where the stitch is visible...
hey it's going to look so good you want that baby to realize that it's actually hand made, ha.
hand stitch the button eyes on.  
i have found it easier to add these on after sewing the two pieces together. 
 i sew the two eyes on at the same time. 
it looks kind of cute with the tufted look at the eyes.
tuck your card in there and throw a string around it.
easy? let me know...

Tuesday, January 10, 2012

never too late

i love that there are no rules to blogging...if i want to finally post a little bit of our christmas cheer, i can.
  
i blog for many different reasons...
a creative outlet, 
somewhere to put the thousands and thousands of pictures that i take,
but most of all because i want to be the memory keeper of our lives.

i skipped out on blogging during most of our christmas season so that i could enjoy our crazy busy time a little more.  
ella had three weeks off of school and we filled pretty much every hour of every day.
there were probably way too many late late nights but we had a whole lot of fun.
here are a few pics from our christmas day.
christmas morning
 vintage comic books
christmas evening
oh so many presents...
playing the ornament hunt game...we lost...i think we had the worst time
next year, guys, watch out...
it was a good day!

Friday, September 9, 2011

a new obsession :: craft gawker

  (all images from craft gawker)
last week my friend opened a whole new world and obsession for me...craft gawker.  that's right, a place to go and gawk at pretty much amazing crafts.  i had never been on that site and it is so much fun.  majority of the crafts are amazing and i would actually want to make.  here are a couple that caught my eye.
 the best part about this site is when you click on the craft you like it links directly to the site with the how to steps.


time to go gawk....

oh, and speaking about gawking, the new MISHA LULU site is up.
so beautiful!!!

have a good weekend!

Monday, March 14, 2011

Play-dough Balls Run

A while back I saw this cereal box marble run on Made by Joel and so of course we had to try one.  We don't have any marbles so we had to make our own.  We made play-dough balls. The kids loved it, but eventually it got destroyed.  Every time we have an empty cereal box, Julian asks me to make another 'play-dough balls toy where you cut the box and then we make little balls and then we put the balls in on top and then it falls in and then it goes down and it goes real fast and it goes back and forth and then it makes a big pile of balls on the bottom, you know that toy?...please'.  He doesn't forget a step. 
We hadn't made one in a while so we made one.  
He can't get enough of it.  We will see how long this one lasts.
Maybe I need to make one out of wood.  Hmmm.
I would definitely need Andy's help on this one, it's no raised plantar bed.

Tuesday, February 22, 2011

Book Love!

I was going through the kid's books organizing, weeding out ones that we don't read too often and trying to make more room for our every growing collection.  As I was going through them, I realized some of my favorite books are the old vintage ones I have collected here and there.  They have great illustrations.
 Here are a couple of my favorite.
 I love this one and the kid's do too.  We have read this book hundreds of times.  It is now really falling apart and we don't read it much because I want to somehow repair it before we destroy it more.  This was a gift from a friend when Ella was born.  It was published in the 1956.  I love the kid's clothes and most of all I love the way these kid's play..the way kid's should play, using their imagination and being creative in their play.


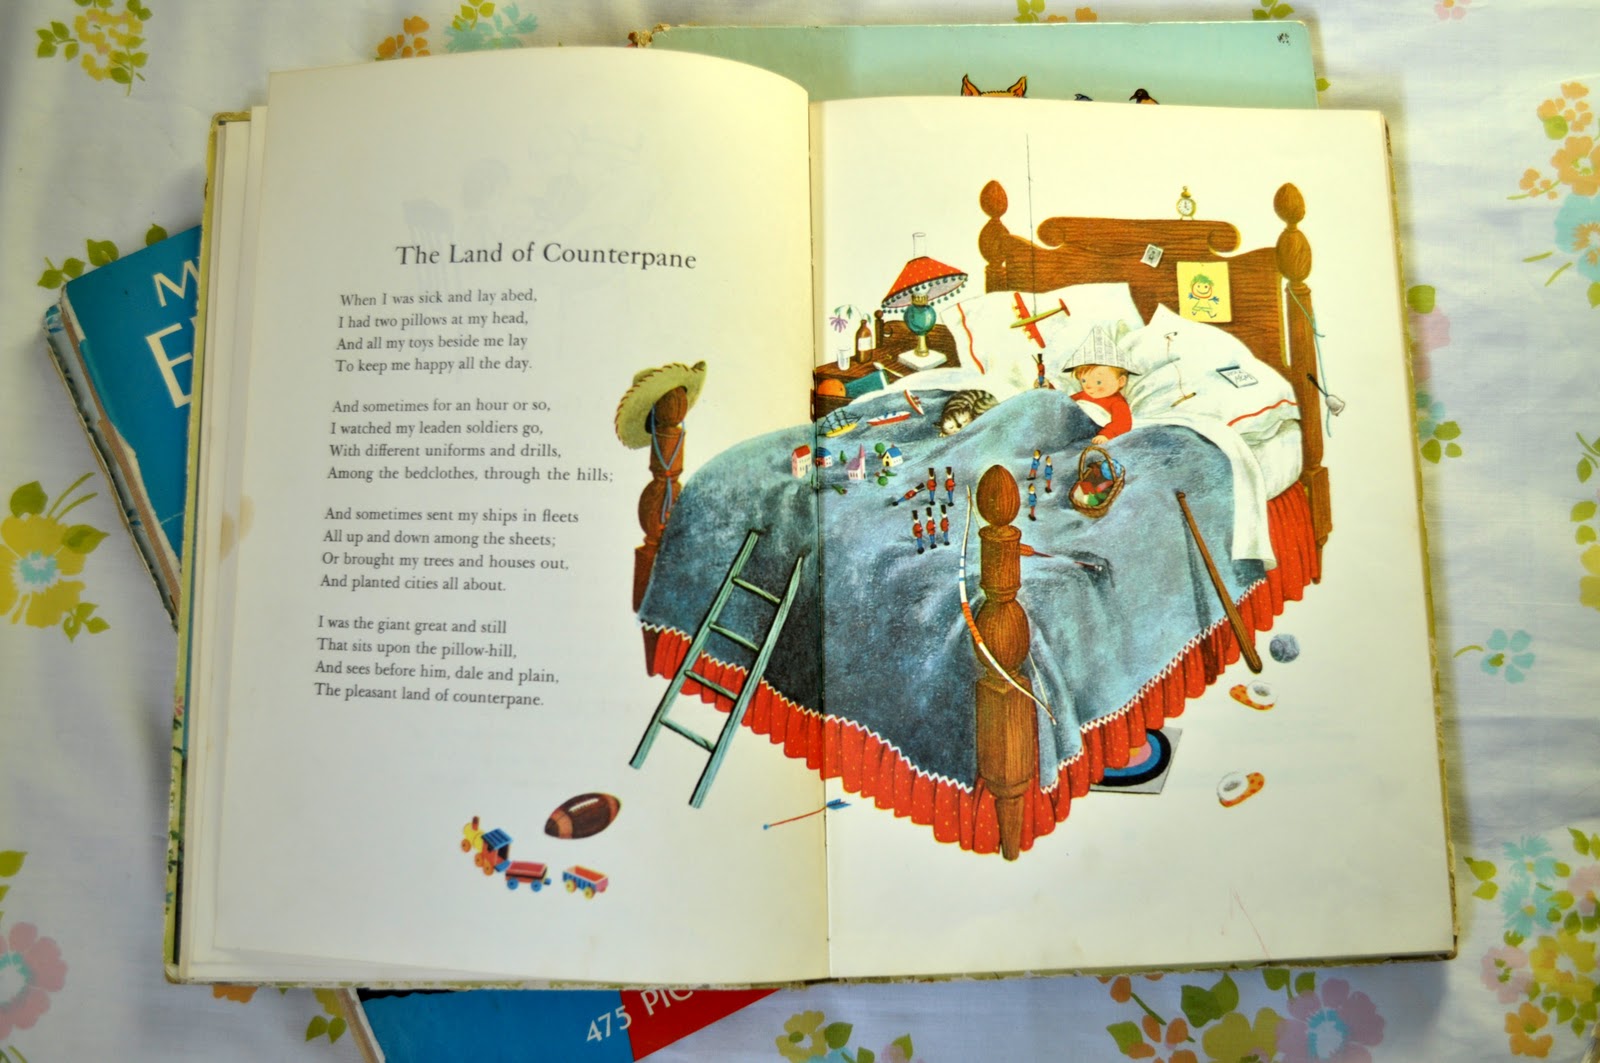
 This one is called A Child's Garden of Verses by Robert Louis Stevenson and illustrated by Gyo Fujikawa.  It was published in 1957.  Love these illustrations also.


 A great collection of classics published in 1959.  This one is falling apart also.


 Another favorite of the kids with great illustrations, published in 1959.


 I love the record player illustrated under the heading 'And How We Live Today'. 
We love these books...a little too much.  We need to find a place to rebind them before they are destroyed.